Showing posts with label craft. Show all posts

Monday, September 27, 2010

Wedding Tutu


Isn't this tutu adorable?

My niece had a birthday and was turning four {not to be confused with my other niece, who I made the magnet board for :) }.

I thought about what Emmy would love to get. She loves to have her dolls get married and I thought, why not make her a wedding tutu with a veil? So I did!
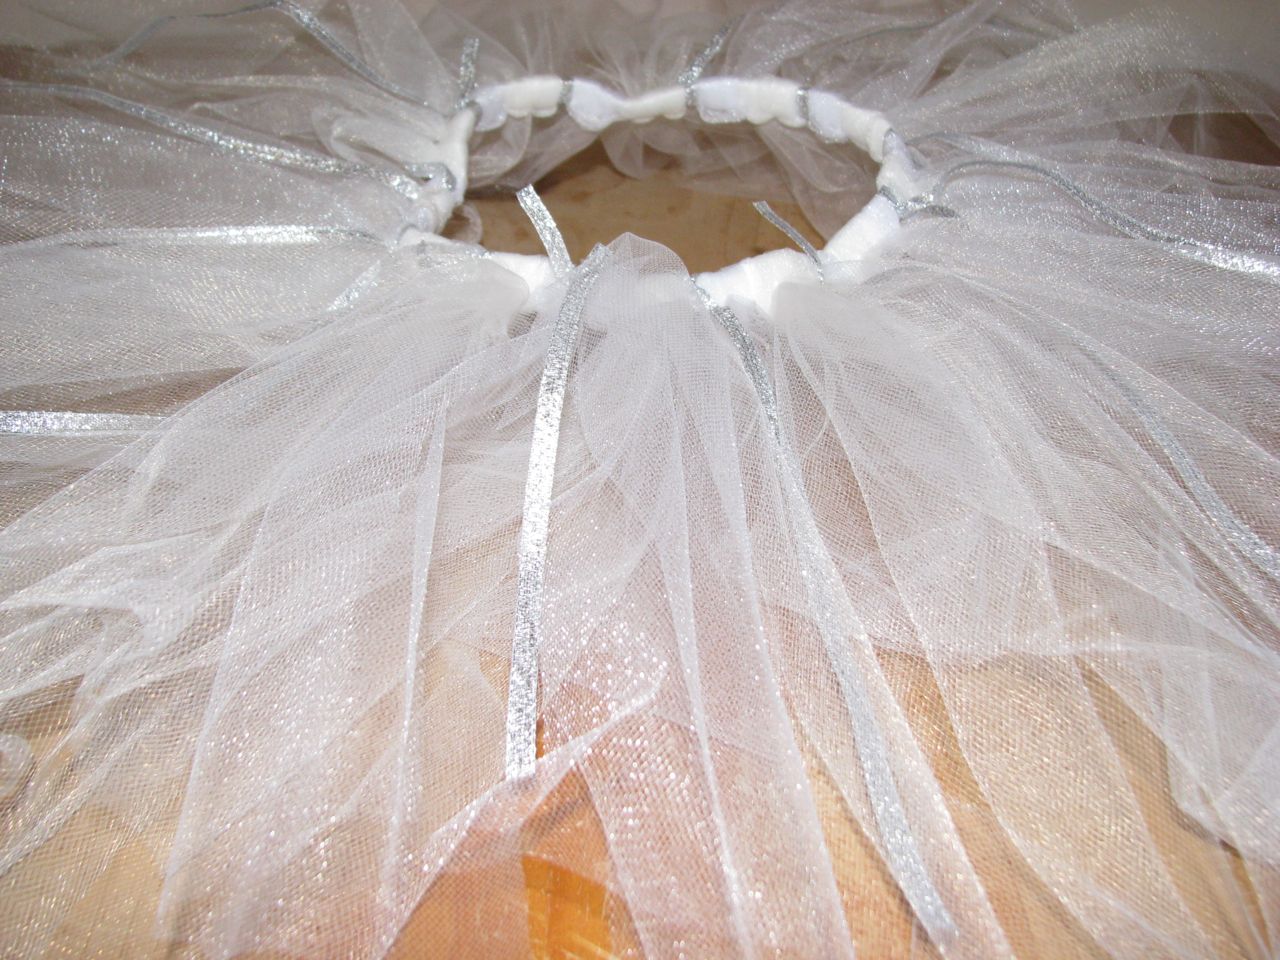
On top of the white and ivory tulle, I added silver ribbon to the tutu to add a little more zing.


For the veil, I got a french-clasp barrette and tied strips of tulle to it. I then hot glued some rhinestones and white flowers to it. I did the barrette so the veil would stay in her hair through all of her playing!


I had Emmy try it on to make sure it would fit. As you can see, she loved it!
{Don't look too close at the dirty mirror . . . what can I say, my kids love to touch the mirror and look at themselves!}

I also got my niece a pair of white gloves to go along with it!

Tutu . . . check!
Veil . . . check!
White gloves . . . check!

This girl is ready to play bride!!!

Now she needs to find a groom . . .

Tuesday, September 14, 2010

Dollar Store Magnet Board


I don't usually blog about crafts and projects that I do, but this one is so adorable and easy, I couldn't resist blogging about it!

A few months ago, I was at the Dollar Tree when I found some metal serving trays. I got the great idea to spray paint them and turn them into a play serving tray!

The one I did at the beginning of the summer is used to hold Emmy's play cupcakes:


So I got another idea . . . why not use one for a magnet board? It is my niece's birthday this week. She's turning eight and so this is right down her alley. I thought I would make one for her for the big day.

Here's how I made it:

1) I started with a rectangular serving tray (I found it in the wedding section)

2) I primed the edges (when I did the first serving tray, I didn't prime it and the spray paint didn't go on very evenly . . . it could have been a faulty nozzle, but I thought I'd prime it this time just to be safe)

3) Next, I spray painted the tray. I had already picked out my scrapbook paper that I was going to mod podge onto the tray, so I used a coordinating color.

4) I cut out the paper to fit the center of the tray. Then I mod podged it on.

5) I got these clear glass oval rocks at the dollar store, too. These are what I made the magnets out of.

6) I cut my paper to fit on the glass rocks and glued it on. Then I glued on my magnets.

{This is what it will look like from the front. I also used some rub-on letters to spell her name on the magnets}

Add a small easel (I had one already, but you could get one at the thrift store and spray paint it any color you want), some tulle or ribbon and - Voila! An adorable magnet board!!!

My niece loved it! I will definitely be making more of these. The one I made for my niece cost me a total of $2.00! I bought the tray and the glass rocks - everything else I had on hand!

I love me a fast, easy, budget friendly project - especially when it is for a birthday!

I'm linking up with:

Join  us Saturdays at tatertotsandjello.com for the weekend wrap up          party!

Saturday, February 6, 2010

Valentine Project

It's so fun making crafts to help decorate and celebrate each season and holiday.  Jen over at Tatertots & Jello inspired me with her XOXO Marble project.  So fun and cute!  If you haven't seen her blog, you should definitely go there right now!  She always has some really fun and affordable projects going on with lots of tutorials so you can do it yourself.  She is so crafty and talented and I LOVE reading her blog and getting fun ideas.

So, I was feeling a little lazy and wanted to do something easier than gluing marbles for the project.  I was at the craft store and found some cute, glittery chipboard letters and knew they were just what I was looking for.  I got two different scrapbook papers, got the chipboard letters, and went to Walmart to get some mini frames (they didn't have any black ones that were mini at the dollar store, otherwise I would have gotten some there). 

And voila! 

I love the way it turned out!  Now I have a fun and unique Valentine's Day decoration.  Thanks for the inspiration, Jen!

Tuesday, September 22, 2009

Halloween!

I {love} this time of year! The air gets crisp, the leaves start to change. I want to make soup and apple pie!

I decided to decorate a little early for Halloween this year.

I bought this at the dollar store:

With a little Modge Podge and glitter, I turned it into this:

So fun! I did it w/ a black tombstone, too. I forgot to take the "before" picture, but here is the "after" pic:

The tombstones were only a dollar each, I already had the Modge Podge, and the glitter was about $3 at WalMart. What a fun and inexpensive way to give your Halloween decorations a little oomph!

Even though I wish I did, I didn't come up with this idea on my own. I got the idea HERE.

Saturday, March 22, 2008

Curtain Project

I had been looking for curtains for Emmy's room everywhere and couldn't find any that I liked or any that matched. So I finally decided to make some (with my mom's help - I'm not the best seamstress!). So, voila! I'm so excited to tear down the blanket and have the pretty curtains - they match her bedding, yay! So here is a before and after picture (keep in mind that my parents are still living with us for another couple months so my dad's clothes are hanging on a clothes rack in Emmy's room. Those are the clothes you can see in the pic):

BEFORE:

AFTER: